Tutorial- Create Managed Project with Cement Module
Tutorial - Create Managed Project with Cement Module
Description
Create the project for this tutorial and add the cement module in the project
You will learn to
To create a managed project
To add a module to the project
Depends on
Tutorial - Install cement module
Step 1 – Create project
Click Project Manager button 
Click Create new project button 
The Metadata dialogue window appears.
Give a name to your project
Step 2 – Add cement module to the project
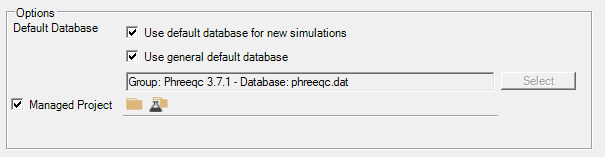
A prerequisite to use a module in HPGeochemistry is that it is a managed project:
Ensure that the Managed Project is checked in the Metadata dialogue window
For the Cement Module, folders for data, database and modules are required.
Open the Folder Manager for a managed project 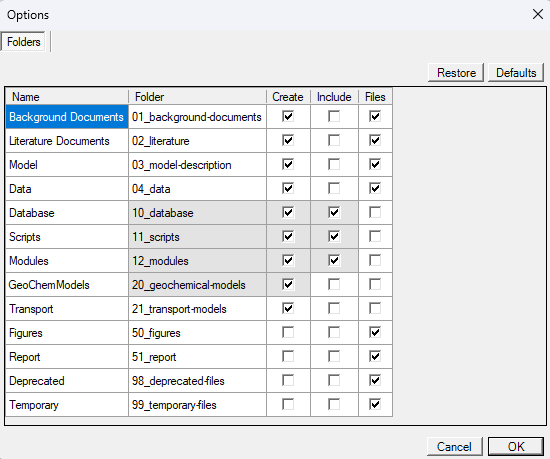
Ensure that the folder Data (04_data) is checked

OK
Click Module Manager button for a managed project 
Check Cement Module
Click Import
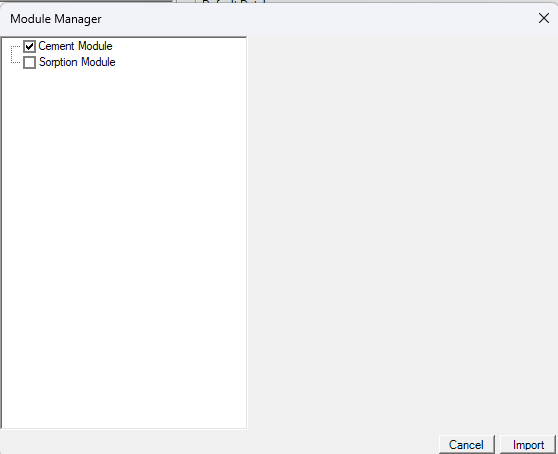
Click OK
END Create Managed Project with Cement Module